Showing posts with label summer. Show all posts

Friday, August 2, 2013

Let’s Talk About Muffins

That’s right, muffins. Not just any muffins, but the absolute best muffins I have ever had. I prefer a muffin that is moist, slightly spongy with just enough spring upon taking a bite, more dense than a cake but not like bread and of course it has to look appetizing. For those who say that a muffin is just a cupcake sans the frosting should give one of these muffins and asked if they still hold that opinion after trying it. If your muffins are like a cupcake then there is something seriously wrong.

 DSC_5749 Edit

Muffins tend to get a bad name of being too dry, crumbly, lacking in flavor, and overall unappealing. I tend to think that they are for the indecisive. For the person who wants the density of a light bread and the flavor of a cake without the sweetness of the cap of overly-sweet, coma inducing frosting. It’s hard to find cupcakes with the right ratio of frosting to cake, and one that has a light frosting with a moist, flavorful cake is a rarity at least in these parts of town. If you think the cake is not as important as the frosting, think again. The cake is everything. It’s the vehicle on which that mound of fluffy sweetness is delivered. Because the cakes are often disappointingly dry I end up scraping off the frosting and eating it by itself. I realize this is similar to the eating habits of a 12 year-old, but I just cannot get past the dry cake and I cannot bear the thought of wasting a perfectly good serving of frosting.   

Obviously cupcakes are a whole different post in themselves. I will be making some in the near future and will share my experience with the pursuit for the perfect cupcake.  

DSC_5767 Edit

Getting back to the muffins, I’d like to point out that the original recipe for this muffin was found on Pinterest which then linked me to the BAKER upstairs’ blog. Is it sad when you start turning to Pinterest for recipes instead of the 50+ cookbooks that you have sitting on the shelf in the other room collecting dust? I thought so. Still, I shamelessly go to Google or Pinterest to find inspiration for a recipe and more often than not I will judge a recipe based on the picture attached to it. A little tidbit of advice, do not do this, especially when searching user based recipe databases because more often than not the picture you see is not a professional picture or of professional quality. It is a home cook with a camera who is under no obligation to make the picture look “pretty”. It is a photo of real food and real results. This is why sometimes I like to look at recipes that do not have pictures that way I am forced to read through the ingredients. It makes me visualize what it will look like and how it will taste. Muffins are humble in their own way and perhaps this is why they are hard to photograph. They just do not grab your attention. Really, do not judge a book (or muffin) by its cover (or picture). 

When I saw this recipe I noted two things: the title of the recipe and the pictures. I scanned the ingredient list to make sure we had everything and I proceeded to make them without even thinking about the ratios of berries/dry ingredients/butter. Fortunately, these muffins turned out to be perfect in every way. I used frozen berries because it was late at night and we did not have any fresh. I also had to use almond milk because we were out of cow’s milk. I probably should have drained the berries after they thawed because there was a lot of liquid that poured off when I added them to the batter. With that said, I think that extra liquid helped the muffins to remain moist. If I make them again I will drain off any excess liquid and give it a go. I will say that because of the liquid the muffins had a greyish/blue hue to the batter which came out looking like mold in some parts. Mmmm. Penicillin anyone? That did not bother me though. If you want to be picky about the presentation and decide to use frozen berries and the drained liquid, might I suggest that you do not use blue cupcake liners as these will make the muffins look even more molded than if you used white liners.


DSC_5762 Edit

Happy Baking!

Bakery-Style Triple Berry Muffins

Adapted from the BAKER upstairs

Prep time: 10 minutes

Baking time: 15-20 minutes

For the Muffins:

1 1/2 cups flour

3/4 cup sugar

1/2 teaspoon salt

2 teaspoons baking powder

1/3 cup melted butter

1 egg

1/3 cup almond milk (regular milk is fine)

1 1/2 cups frozen mixed berries (see note earlier about using frozen berries)

For the streusel:

1/4 cup sugar

5 tablespoons flour

2 tablespoons butter, cut into cubes

3/4 teaspoon cinnamon

Directions:

Preheat oven to 400 and line 12 muffin cups with paper liners. You can also spray with cooking spray, but the liners are a guaranteed way to ensure that the muffins will release from the pan.

In a large bowl, whisk together all dry ingredients.

In a separate bowl, mix together the melted butter, egg, and milk. Make sure that you let the butter cool a little before you add the egg and milk as they will curdle if added to hot butter. After combined, add to the dry ingredients.

Fold in the berries (and liquid if using).

I filled the liners about 3/4 the way full and the muffin tops did not expand too much. You can fill them less if you want smaller muffins.

Make the streusel by whisking together the flour, sugar and cinnamon. Cut the butter into the dry ingredients until a crumbly mixture that resembles wet sand forms (you can also use a food processor for this step just be careful not to cut the butter too small).

Sprinkle the topping over the muffins and bake for 15-20 minutes or until browned on top. I ended up cooking mine for 25 minutes before the tester came out clean.

Saturday, July 7, 2012

Birthday Dinner


Hello! I hope everybody enjoyed their midweek Fourth of July parties. Did anybody else wake up the next morning thinking it was Monday? It’s funny how a holiday in the middle of the week can throw things off kilter. I admit, since I've been on break from school, all the days just seem to run together. I guess that's the beauty of summer though.

Let's talk about birthdays. Birthdays can be very strange events. Some people greet them with excitement and eagerness, planning everything from the cake to the guest list. Others look at them as simply another year older - another chapter in their book that is being written with every day that passes. For the most part, my family falls into the latter category. We never were the type of family to make a huge production of birthdays; there was no massive "super sweet 16" party or a house full of teenagers and loud music trashing the place. Instead, they were usually intimate including only family and close friends. Sometimes it was just family. For my parents it was one of two options: stay home and cook a meal or go out to eat. This year was no exception. For those of you fortunate enough to know my father knows that he is a man of little fuss. His birthday was this past week, and as per every year we ask the millionaire dollar question - "Would you like to go out for your birthday, or eat at home?" Every year it's the same response, "What does everybody else want to do?" You can only imagine the frustration that comes with the indecisiveness. After a couple minutes of discussion there is a decision. This year he requested a large salad (he is complicated to cook for...AKA a picky vegetarian/vegan). A salad he said. I walked away grumbling because I was hoping for some answer other than a salad, something with a little more pizzazz. 

And so started my search for inspiration..and a recipe. Cooking for a vegetarian/vegan can be hard. Trying to find a variety of foods that aren't repetitious can be frustrating; and then you have to verify that it is what that person is wanting. I stumbled upon a recipe for stuffed peppers and knew it was exactly what I was looking for. They're hearty, packed full of protein, but not too heavy. We have made stuffed peppers before with soy Chorizo, but my father gets burned out on pseudo meat quickly so I had to find another protein substitute. One of the great things about this recipe? You steam the peppers in the microwave for about 7 minutes, drain, cool slightly, and stuff! How easy is that? The stuffing alone would make a wonderful side dish to any meal. I halved the recipe and used 1 orange and 1 yellow bell pepper. The recipe called for Orzo pasta and sun-dried tomatoes, but we didn't have any on hand. So I opted for brown rice and omitted the tomatoes. I would suspect you could use tomato paste if you are in a pinch. I subbed the 1/2c Orzo for 1/2c of short grain brown rice.


The peppers are wonderful hot or cold. You know how some dishes just taste better the next day? Next day leftovers anyone? This is a recipe I will definitely be keeping on hand for future reference. 

For dessert, instead of the traditional birthday cake, I baked a simple zucchini bread. He loved it just the same (I guess I should mention he isn't a huge fan of cakes? Unless it's a carrot cake..without frosting). 

Enjoy!

"It takes a long time to grow young."
~Pablo Picasso

Greek Stuffed Peppers (with my alterations)
Original recipe from EatingWell
Serves - 4
Total time - 40 minutes*

Ingredients:
4 yellow, orange and/or red bell peppers
1/2 cup whole-wheat orzo (I used 1/2c brown rice)
1 15-ounce can chickpeas, rinsed
1 tablespoon extra-virgin olive oil
1 medium onion, chopped
6 ounces baby spinach, coarsely chopped
1 tablespoon chopped fresh oregano, or 1 teaspoon dried
3/4 cup crumbled feta cheese, divided
1/4 cup sun-dried tomatoes, (not oil-packed), chopped (I left this out)
1 tablespoon sherry vinegar, or red-wine vinegar
1/4 teaspoon salt

Directions:
1. Halve peppers lengthwise through the stems, leaving the stems attached. Remove the seeds and white membrane. Place the peppers cut-side down in a large microwave-safe dish. Add 1/2 inch water, cover and microwave on High until the peppers are just softened, 7 to 9 minutes. Let cool slightly, drain and set aside.

2. Meanwhile, bring a large saucepan of water to a boil. Add orzo and cook until just tender, 8 to 10 minutes or according to package directions. Drain and rinse with cold water. (If using brown rice, bring 1 1/2c water to a boil. Add 1/2c rice and pinch of salt. Reduce to a simmer, cover and let cook for 40 minutes or until water is absorbed and rice is tender.)

3. Mash chickpeas into a chunky paste with a fork, leaving some whole.

4. Heat oil in a large nonstick skillet over medium heat. Add onion and cook, stirring, until soft, about 4 minutes. Add spinach and oregano and cook, stirring, until the spinach is wilted, about 1 minute. Stir in the orzo, chickpeas, 1/2 cup feta, tomatoes (if using), vinegar and salt; cook until heated though, about 1 minute. Divide the filling among the pepper halves and sprinkle each pepper with some of the remaining 1/4 cup feta.

*If using brown rice, allow 1hr for total cook time. 


Wednesday, July 4, 2012

Let Freedom Ring

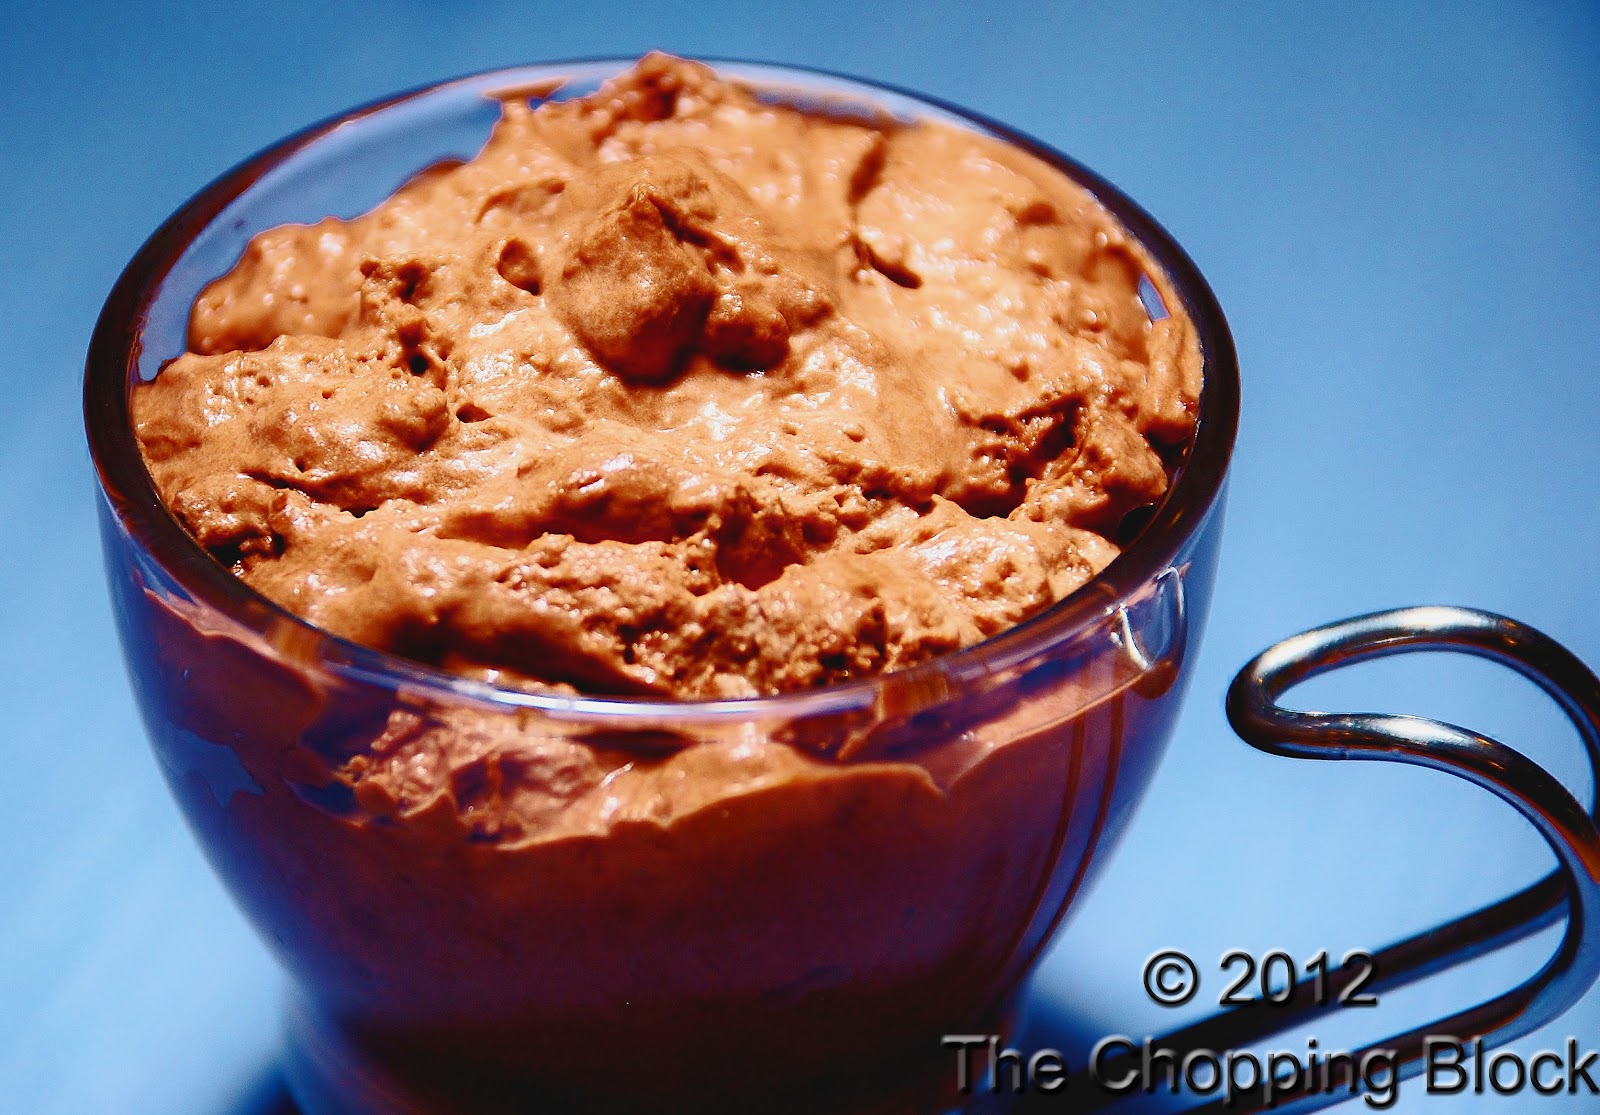
Hello! I trust you and your loved ones are having a wonderful and safe Fourth of July. I am making this a brief post and leaving you guys with a recipe I tested today - the most decadent chocolate mousse. It's light and airy, with a robust chocolate flavor that is sure to please all chocolate lovers. If it's too rich for you, add a dollop of sweetened whipped cream and top with milk chocolate shavings and enjoy!


Heavenly Chocolate Mousse
Serves - 6
Prep time - 30min.
Chill time - 8hrs-overnight


Ingredients:
8 (1 ounce) squares semisweet chocolate, coarsely chopped
1/2 cup water, divided
2 tablespoons butter
3 egg yolks
2 tablespoons sugar
1 1/4 cups whipping cream, whipped


Directions:


1. In a double broiler, heat chocolate, 1/4 cup water and butter until the chocolate and butter are melted. Cool for 10 minutes. In a small heavy saucepan, whisk egg yolks, sugar and remaining water. Cook and stir over low heat until mixture reaches 160 degrees F, about 2 minutes. Remove from the heat; whisk in chocolate mixture. Set saucepan in ice bath and stir until cooled, about 8 minutes. Fold in whipped cream. Spoon into dessert dishes. Refrigerate for 8 hours or overnight.


Enjoy!


Friday, May 18, 2012

Strawberries in Meyer Lemon Syrup


Hello hello! It's been sometime since my last post, but that doesn't mean I haven't been keeping busy. I finished my last semester at junior college, went to the Haute Wheels Food Truck Festival. I know this post is a little late, but bear with me!

While at the store picking up a few things for dinner, as always, I find something I need that isn't on my list. Strawberries right now are just beautiful and I couldn't pass them up. I’ve always been a big fan of strawberries, and I can say without shame that possibly my favorite way to eat them is still dipped in chocolate. However I can never just eat one or two of them. So to keep things “healthy and light” I opted for this recipe I found on Cooking Light’s website. It was so simple yet so refreshing and perfect for the time that I had. It was a great way to finish off a heavy dinner, and convenient to boot. (Of course this would also be lovely as a midday refresher on a hot summer day – maybe throw in blueberries and add lemon zest?)  


The directions are simple and there isn’t much more to it than what you see – no surprises 
here. I loved how the strawberries, which were naturally sweet, were tamed by the lemon juice. I was afraid that the extra sugar would make this far too sweet, but was pleased to find that not true. If you aren’t a fan of lemon, than I would reduce the lemon juice to 2tbs. Also I used Meyer Lemons as the recipe calls for. If you are using regular lemons, I would suggest starting out with 2tbs, tasting, then adding more as desired. For the topping, I whipped 1/4c of heavy cream with a splash of almond extract to cut the milky taste. If using a hand mixer, I always freeze the bowl and beaters 15 minutes before I need them. I found this helps the cream to form and keep its peaks.

Enjoy!


"Strawberries are the angels of the earth, innocent and sweet with green leafy wings reaching heavenward." ~Terri Guillemets

Strawberries in Meyer Lemon Syrup


Ingredients
4 cups quartered small strawberries
1/4 cup fresh Meyer lemon juice
1/4 cup sugar
1/4 cup whipping cream

Directions
1. Place berries, juice, and sugar in a large bowl; toss gently to coat. Cover and chill 20 minutes.
2. Place cream in a medium bowl; stir constantly with a whisk until soft peaks form. Serve whipped cream with berry mixture.

Friday, October 28, 2011

Jasmine Rice with Sweet Onions and Summer Herbs


What's on the menu for tonight: Shrimp Cocktail, a Simple Dinner Salad, Tilapia with Lemon Butter and Caper Sauce, Jasmine Rice with Sweet Onions and Summer Herbs, along with Roasted Zucchini and Yellow Squash.


There are some things that you just never get tired of. They always fit the occasion, and are sure to please. This dish has become an instant hit and my go-to recipe when I want a fresh side to accompany fish. I have made this with Salmon and Tilapia, and honestly it's fabulous either way. The first time I made it I added fresh mint and lemon zest along with the Tarragon and Dill; while this time I made it according to the recipe with only slight modification. While I can take credit for this dish, I have to give credit where credit is due; to my mother. She takes credit for everything else we had tonight. Even if she creates-it-as-she-goes, it always turns out amazing; no recipe in mind, whatever we have around the house = simple flavors with subtle complexity, which speaks to her personality. As for dessert; right now she has an apple crumble in the oven and I must say it smells heavenly.


As I said earlier, I made a slight modification to the recipe. Instead of using Basmati rice, I swapped it for Jasmine rice.  Also I love the flavor of fresh herbs, so I almost doubled the amount of herbs that is called for. Seasoning with salt and pepper after it has cooked is always a must. There really isn’t anything I would change about this recipe. Fresh, light, and pleasing to the senses; the aromatics that come with this dish are incredible.


Recipe adapted from Bon Appétit

Serves 6
Start to finish time 40 minutes

Ingredients

1 ½ cups basmati rice (about 10 ounces)
2 tablespoons (1/4 stick) butter
2 cups chopped sweet onions
2 ½ cups water
1 ½ teaspoons salt
3 tablespoons finely chopped fresh Italian parsley
2 tablespoons finely chopped fresh dill
2 tablespoons finely chopped fresh tarragon

Preparation

Rinse rice under cold water until water runs clear; set aside. Melt butter in large saucepan over medium-high heat. Add onions; sauté until translucent, about 5 minutes. Add rice, 2 ½ cups water, and 1 ½ teaspoon salt; bring to boil. Reduce heat to low, cover, and cook until rice is tender, about 15 minutes.

Remove from heat and let stand, covered for 10 minutes. Stir in herbs. Season with pepper and more salt if desired. Transfer to bowl and serve.

Monday, December 6, 2010

Pucker Up for a Mixed Berry Tart

Its August in Texas and that means the heat is on! The one thing I look forward to during the summer is the beautiful abundance of berries that are available at the grocery store. There's something about biting into a ripe berry that is so tantalizing. The burst of juice that hits your tongue, slightly sweet and bitter, that makes you want to pucker.

I am always looking at recipes and getting ideas of what I
would like to make for when a particular ingredient is in season. Anybody who knows me knows that I have a sweet tooth. In fact, if I could eat dessert for every meal, I would. I had this book, "Desserts" by Ting Morris, Rachel Lane, and Carla Bardi, for quite some time. Sadly it has been sitting on the bookshelf not in use. What caught my eye about this book was the cover recipe. (Yes, its true, I will get a cookbook even if its just for one of the recipes.) I couldn't pass up the beautiful Mixed Berry Tart waving at me from the front cover.

I made this tart one night around 11pm. It was one of those impulse decisions that I couldn't deny. I grabbed the car keys and ran to the store right before they closed. Yes, this tart was worth the trip out. Cream cheese, sugar, strawberries, kiwifruit, blackberries, raspberries, blueberries, and apple jelly. What more could you ask for? It was the perfect match.

All in all this has to be one of the simplest tarts I have put together. The most difficult part about this recipe would have to be the patience required during the chilling process. If you are like me, you can just eat the tart upon completion. The flavors aren't quite melded at this point, but none the less delicious. My favorite component of this tart would have to be the cream cheese base. Its simple, its fresh, and oh so addicting. The little bit of lemon that is added to it elevates the flavors of the berries to a whole new level. The apple jelly glaze not only gives a pretty, polished finish, but also adds a hint of apple at first bite.


Mixed Berry Tart
Serves 6 - Prep: 45 min. - 30 min. chilling - Cooking: 20 min.

1 recipe Sweet Tart Pastry (noted below)

Filling and Topping
4 ounces (125g) cream cheese, softened
1/2 cup (75g) confectioners sugar
2 tablespoons double (heavy) cream
1 teaspoon finely grated lemon zest
1 tablespoon freshly squeezed lemon juice
4 strawberries, hulled and sliced
3-4 kiwifruit, peeled and sliced
1 cup (200g) blackberries, raspberries
1/2 cuo (100g) blueberries
1/3 cup (90g) apple jelly

1. Prepare the pastry as explained in steps 1-4

2. Keep the oven temperature at 400F

3. To make the filling, beat te cream cheese, confectioner's sugar, whipping cream, lemon zest, and lemon juice until light and well blended. Spread in the cooled tart shell and smooth the tops.

4. Arrange a row of strawberry slices around the outside edge of the tart so that the tips of each slice extend beyond the crust. Lay the kiwifruit slices over the strawberries to partially overlap them. Arrange a standing row of raspberries inside the blackberries. Place the blueberries in the center of the tart, covering the filling. The fruit should cover the filling with concentric circles.

5. Heat the jelly until liquid. Brush the fruit with the melted jelly. Refrigerate the tart for at least 30 minutes before serving


Sweet Tart Pastry

1 1/3 cups all purpose flour
1/4 teaspoon salt
1/3 cup confectioner's sugar
1/2 cup cold unsalted butter, cut into small cubes
1 large egg yolk
1-2 tablespoons water, as required


1. Mix the flour, salt, and confectioner's sugar in a medium bowl. Cut in the butter with a pastry blender, until the mixture resembles fine bread crumbs. Add the yolk and knead lightly unti the ingredients come together and form a firm dough. Press into a log, wrap in plastic wrap, and chill for at least an hour

2. Preheat oven to 400F. Lightly oil a 9-inch fluted tart pan with a removable bottom.

3. To line the pan, unwrap the dough and place on a lightly floured work surface. Roll the dough out until it is about 2 inches larger than the tart pan. Roll the dough loosely onto the rolling pin and unroll it evenly over the tart pan. Press the pastry evenly around the bottom and sides to a thickness of 1/8-1/4 inch. Pinch the edges to rise 1/8 inch above the edge of pan. Prick the bottom with a fork. Refrigerate for 30 minutes.

4. Line the tart shell with parchment paper and fill with pie weights or dried beans. Bake for 10 minutes, remove the parchment and beans, and bake for another 5-10 minutes, until light brown and dry to the touch. Remove from the oven and leave to cool.


Sunday, September 5, 2010

Summer's End

Whew!! First week of school down and only 15 more to go. The mad rush of back to school is always a challenge, and getting back into the swing of schedules and hitting the books is no easy task either. It feels like you are running non-stop until the weekend. Work hard, play harder, crash and burn, repeat. That's my week in a nutshell. Everybody needs some down time. That's where you learn to treasure every minute of the weekend. But why is it the weekends seem to come and go like a whirlwind? Before you blink its over and your hectic week starts all over again. Is it just me, or does summer seem to be getting shorter and shorter every year?

All the hours spent sitting in class, standing at work, and helplessly trying to please everybody started to catch up to me. I couldn't stare at another wall for another minute. I had to get outdoors to breathe.
This evening, I pulled my bike out of the garage, dusted it off, and too myself on a much needed ride through the neighborhood. The outdoors have always interested me, and being outside in the woods always gave me the feeling of being so small. As if the woods could swallow you whole. Taking a minute, I stop to take note of my surroundings. The sun is just beginning to set, birds are singing in the trees, kids are out playing in the yards, dogs are barking, bonfires burning, and the grills are a blazing. The purple and pink subtle clouds in the sky reminded me of cotton candy. I use to love staring at the clouds, wondering what it would be like to jump on one. The smell of hickory, cut grass, and the damp, humid air reminds me of being at camp. The hours spent running around with friends, playing hide and seek in the woods at night, and roasting hotdogs over an open fire. The days spent without a care in the world, without any responsibilities, or sense of time...when I never wanted to grow up. Those are the days I wouldn't trade for anything. These aromatics of summer are one of my favorite elements.
I no longer dread the thought of summer coming to an end, but see it as the end of a chapter in my life. Now I look forward to each season, wondering what my story will unfold into. I come away from this summer learning 3 key things: you can't settle for anything less than you deserve, you can only help people so much, then the rest is up to them, and that you can't please everybody. Sometimes these are hard lessons to learn, but better learned now than later.

I wanted a no-fuss kind of meal for tonight. Every so often I'm in the mood for a casserole, and where better to turn to than Southern Living. I am a firm believer in their casserole recipes. They remind you of what your grandmother use to make. This recipe was in the March issue of Southern Living Comfort Food magazine. (This is a great source for your staple comfort food recipes such as fried chicken, coconut cream pie, egg salad, etc.) What I really appreciate is that these recipes call for items that you normally have on hand in the pantry. As a plus for families, they are kid friendly.
Seeing that there are only a couple of people in my house that enjoy casserole, I only made half of the original recipe. I picked up a rotisserie chicken from the store and just shredded the breast meat. I am not a huge fan of dark meat, and avoid it whenever possible. I would recommend picking up a chicken unless you have a couple hours to spare, or just love to roast your own chicken.

Don't worry if you find yourself without the exact spices it calls for. Both coriander seeds and marjoram can easily be substituted for the oregano and cumin. Use regular chili powder in place of the Mexican chili powder if needed.
Since I couldn't find lime-flavored white corn tortilla chips, I used green chile tortilla chips.

My casserole took exactly 55 minutes to cook. This was long enough for the chip topping to dry out and form a nice crust, yet not long enough to dry the whole dish out. Make sure you let it stand for 10 minutes as the directions say. This helps the filling set up and form some shape.
There were so many flavors in this dish, its hard to pick one to start at. Lets start with the soup mixture. The combination of cream soups is a perfect match. Add a little tomato with green chiles, bell pepper, and spices, then you have the ultimate soul warming combination. Its thick, hearty, with a little bit of kick that gradually builds with every bite. Throw in some chicken, cheese, and top with a layer of chip. HELLO! Those are the elements of everything a proper casserole should have. It was the perfect ending to an evening of reflection.


Recipe for Quick and Easy King Ranch Chicken Casserole

Makes 8 to 10 servings. Prep: 30 min.
Cook: 17 min. Bake: 55 min. Stand: 10 min.


2 Tbsp. butter
1 medium onion, chopped

1 medium-size green bell pepper, chopped
1 garlic clove, pressed
3/4 cup chicken broth
1 (10 3/4 oz.) can cream of mushroom soup
1 (10 3/4 oz.) can cream of chicken soup
1 (10-oz) cans diced tomatoes and green chiles, drained
1 tsp. dried oregano
1 tsp. ground cumin
1 (2-lb) deli-roasted chicken, skinned, boned, and shredded
3 cups (12oz) shredded sharp cheddar cheese
3 cups coarsely crumbled lime-flavored white corn tortilla chips


1. Preheat oven to 350 degrees. Melt butter in a large skillet over medium-high heat. Add onion, and saute 5 minutes or until tender. Add bell pepper and garlic, saute 3 to 4 minutes. Stir in chicken broth, and next 6 ingredients. Cook, stirring occasionaly, 8 minutes.

2. Layer half of chicken in a lightly greased 13- by 9-inch baking dish. Top with half of soup mixture, 1 cup cheese, and half of tortilla chips. Repeat layers once. Top with remaining cheese.

3. Bake at 350 degrees for 55 minutes or until bubble. Stand 10 minutes before serving.